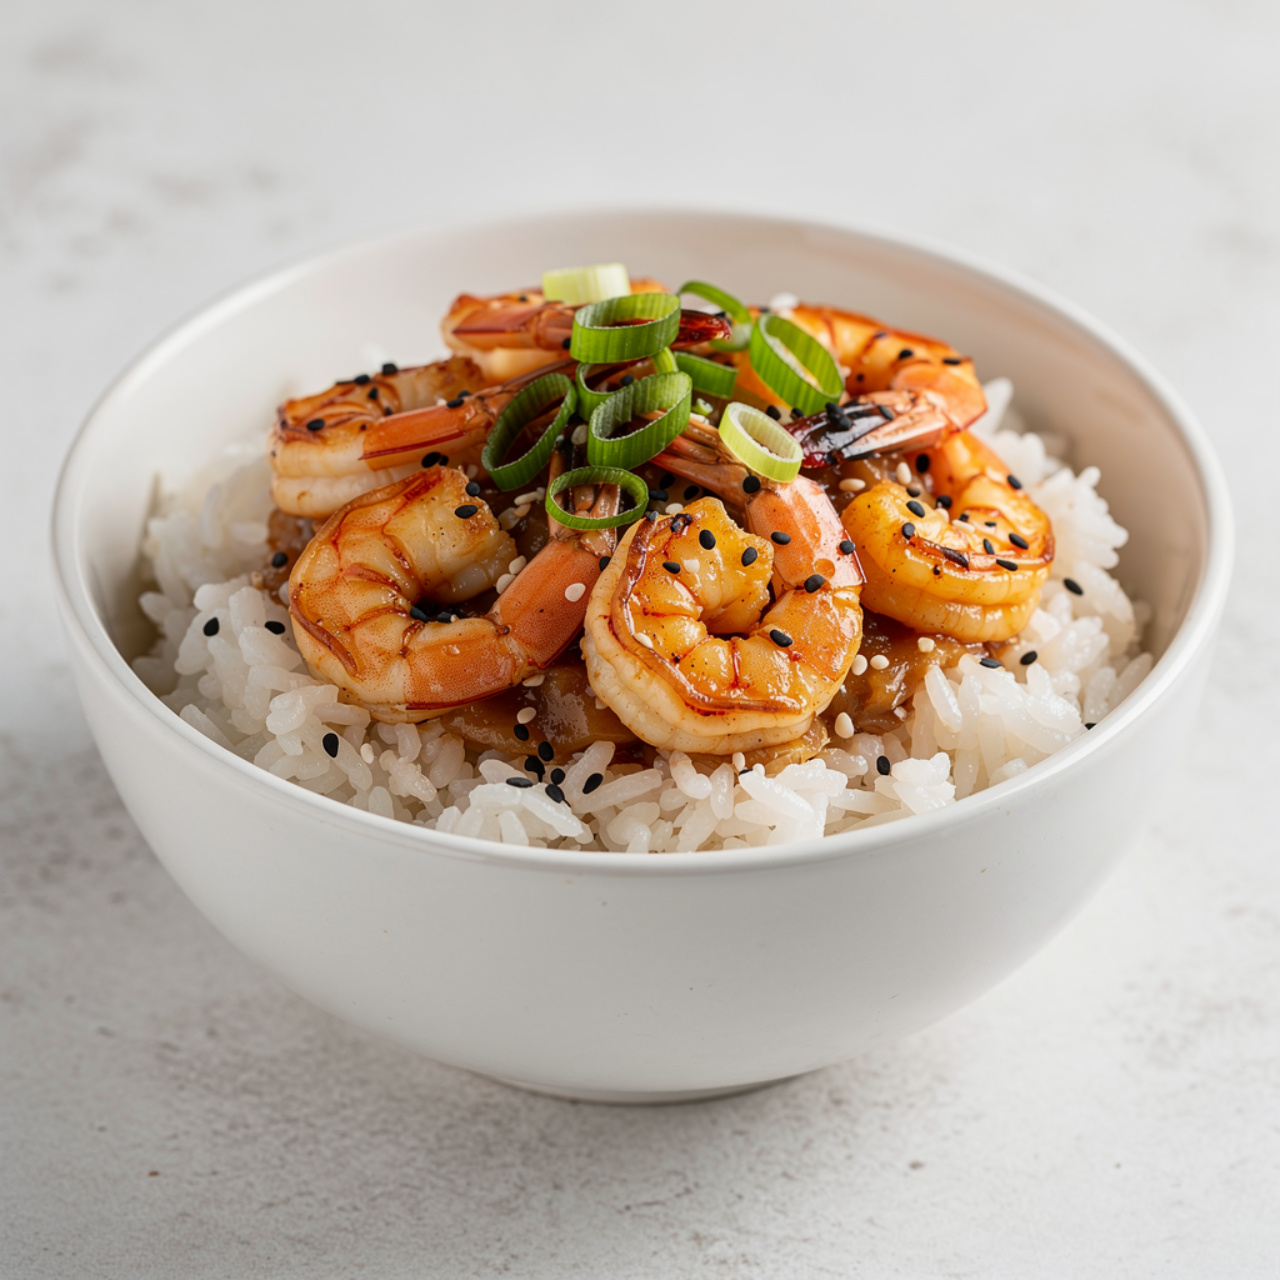
Hibachi Shrimp Rice Bowl
This Hibachi Shrimp Rice Bowl brings the sizzling flavors of your favorite Japanese steakhouse straight to your kitchen in under 30 minutes. Juicy shrimp, savory fried rice, and a buttery hibachi sauce make this an easy weeknight dinner the whole family will love.

The Hibachi Shrimp Rice Bowl You Have Been Craving
There is something undeniably exciting about watching a hibachi chef work a flaming flat-top grill, the butter sizzling, the shrimp flying through the air, the rice crackling at the edges. If you have ever sat around one of those big communal tables and thought, I wish I could make this at home, good news: you absolutely can.
This Hibachi Shrimp Rice Bowl captures every element of that steakhouse experience in a single pan. Plump, juicy shrimp get a quick sear in a screaming-hot skillet until they are lightly caramelized at the edges. They land on top of savory hibachi-style fried rice packed with egg, vegetables, garlic butter, and a splash of soy sauce. A drizzle of creamy yum yum sauce ties everything together. It is a full hibachi meal with shrimp that comes together in under 30 minutes, any night of the week.
Whether you are looking for an easy hibachi shrimp recipe for a weeknight dinner or trying to recreate a restaurant favorite at home, this bowl is going to become a regular in your rotation.
Why This Recipe Actually Works
The secret to any great hibachi shrimp and rice dish is heat and timing. Hibachi cooking is fundamentally about a very hot cooking surface, a little fat, and moving quickly. Most home cooks are too timid with the heat, and the result is steamed food instead of properly seared food.
Here are the key principles that make this hibachi rice bowl taste like the real thing:
- Use day-old rice. Freshly cooked rice is too moist and will clump. Day-old rice from the fridge has dried out just enough to fry up beautifully with crispy, individual grains.
- Get the pan truly hot. Preheat your skillet or wok over high heat for a full minute before adding anything. You want the oil to shimmer the moment it hits the surface.
- Do not crowd the shrimp. Cook them in a single layer with space around each one. Crowding drops the pan temperature and leads to rubbery shrimp instead of a gorgeous sear.
- Butter is non-negotiable. That signature hibachi richness comes from a generous hand with good butter. Do not skip it or substitute with cooking spray.
Chef's Tip: Press the rice into the hot pan and let it sit undisturbed for a full minute before stirring. This is how you get those coveted crispy, toasted bits throughout the bowl.
The Right Tools Make a Real Difference
For a dish like this hibachi shrimp fried rice, your cookware is doing a lot of the heavy lifting. A thin, flimsy pan will not hold heat the way you need it to, and the results will be disappointing. A high-quality wok or a heavy 12-inch cast iron or stainless skillet gives you the sustained, even heat that makes hibachi-style cooking possible at home.
Ingredient Notes and Easy Swaps
This recipe is wonderfully flexible. Here is what to know before you start:
Shrimp: Large or extra-large shrimp work best here since they hold up to high heat without overcooking in seconds. Fresh is great, but frozen shrimp that have been fully thawed and patted dry perform just as well.
Rice: Long-grain white rice is the classic choice for a hibachi rice bowl. Jasmine rice adds a subtle floral aroma that pairs beautifully with the soy and butter. Brown rice can work too, though the texture is a bit denser.
Yum Yum Sauce: This creamy, tangy condiment is the finishing touch that elevates a hibachi shrimp bowl from good to great. You can find it at most grocery stores, or make your own with mayonnaise, tomato paste, garlic powder, and a little sugar.
Vegetables: The classic peas-and-carrots mix is traditional, but feel free to use whatever you have. Corn, diced zucchini, sliced mushrooms, or broccoli florets all work wonderfully in this seafood rice bowl with shrimp.
Make It Low Calorie: For a lighter hibachi shrimp bowl, swap white rice for cauliflower rice, pull back on the butter, and use a light drizzle of sauce instead of a full pour. You will still get every bit of the bold, savory flavor.
How to Serve Your Hibachi Shrimp Bowl
Serve this bowl hot, straight from the pan, with:
- A generous drizzle of yum yum sauce or spicy mayo
- A squeeze of fresh lemon over the shrimp
- Scattered green onions and toasted sesame seeds for a little crunch and color
- A side of miso soup or a simple cucumber salad to round out the meal
This hibachi shrimp recipe is also fantastic for meal prep. Cook a big batch of rice and portion everything out into containers for easy lunches throughout the week. The flavors actually deepen overnight, making leftovers something to genuinely look forward to.
Ready to bring the hibachi home? Here is everything you need:
Hibachi Shrimp Rice Bowl
This Hibachi Shrimp Rice Bowl brings the sizzling flavors of your favorite Japanese steakhouse straight to your kitchen in under 30 minutes. Juicy shrimp, savory fried rice, and a buttery hibachi sauce make this an easy weeknight dinner the whole family will love.
Ingredients
- 1 lb large shrimp, peeled and deveined, fresh or thawed from frozen, tails removed
- 3 cups cooked white rice, day-old rice works best
- 3 tbsp unsalted butter, divided
- 3 tbsp soy sauce, low-sodium preferred
- 1 tbsp sesame oil, toasted
- 4 garlic cloves, minced
- 1 tsp fresh ginger, grated
- 2 large eggs, lightly beaten
- 1 cup frozen peas and carrots, thawed
- 1/2 white onion, finely diced
- 2 tbsp vegetable oil, or any high-smoke-point oil
- 1 tbsp lemon juice, freshly squeezed
- 1/4 cup yum yum sauce, store-bought or homemade, for serving
- 3 green onions, thinly sliced, for garnish
- 1 tsp sesame seeds, toasted, for garnish
Instruction
Pat the shrimp dry with paper towels and season lightly with salt and pepper. Set aside.
Heat a large skillet or wok over high heat until very hot. Add 1 tablespoon of vegetable oil and 1 tablespoon of butter.
Add the shrimp in a single layer and cook undisturbed for 1 to 2 minutes until pink and slightly charred on the bottom. Flip and cook for another 1 minute. Add the lemon juice and 1 tablespoon of soy sauce, toss to coat, then transfer the shrimp to a plate.
In the same skillet, add the remaining vegetable oil and butter over high heat. Add the diced onion and cook for 2 minutes until softened and lightly charred.
Add the garlic and ginger and stir-fry for 30 seconds until fragrant.
Push the onion mixture to one side of the pan. Add the beaten eggs to the empty side and scramble them gently until just set, then fold them into the onion mixture.
Add the peas and carrots and stir-fry for 1 minute.
Add the cooked rice to the skillet. Break up any clumps and press it into the pan. Let it sit undisturbed for 1 minute to toast slightly, then stir and repeat.
Drizzle in the remaining soy sauce and sesame oil. Toss everything together and stir-fry for 2 to 3 more minutes until the rice is heated through and lightly golden.
Return the cooked shrimp to the pan, toss to combine, and heat for 1 minute.
Divide the hibachi shrimp rice into bowls. Drizzle with yum yum sauce and garnish with green onions and sesame seeds. Serve immediately.
Equipment
- Large skillet or wok (12-inch minimum)
- Wooden spoon or spatula
- Sharp chef's knife
- Cutting board
- Small mixing bowls
- Paper towels
Notes
Storing and Reheating Leftovers
Store any leftover hibachi shrimp and rice in an airtight container in the refrigerator for up to 3 days. When you are ready to eat, skip the microwave if you can. Instead, heat a skillet over medium-high, add a small splash of soy sauce or water, and toss the rice for a few minutes until warmed through. This brings back the slightly crispy, fried texture that makes this dish so satisfying in the first place.
If you are reheating shrimp separately, keep it gentle, just 1 to 2 minutes in the pan, since shrimp overcook quickly and become tough. A little extra butter does not hurt either.